SEONIB's Specific Getting Started Process and Beginner Configuration Recommendations
Below is a beginner getting started process + configuration recommendation organized based on the official guide. I’ve sequenced it as “set up the framework first, then start writing, then automate publishing,” and following this will generally help you avoid pitfalls.
I. Before Starting: Create Your Project and Fill in Basic Information
Goal: Reduce the time spent repeatedly entering “Product Name / Official Website Link” later.
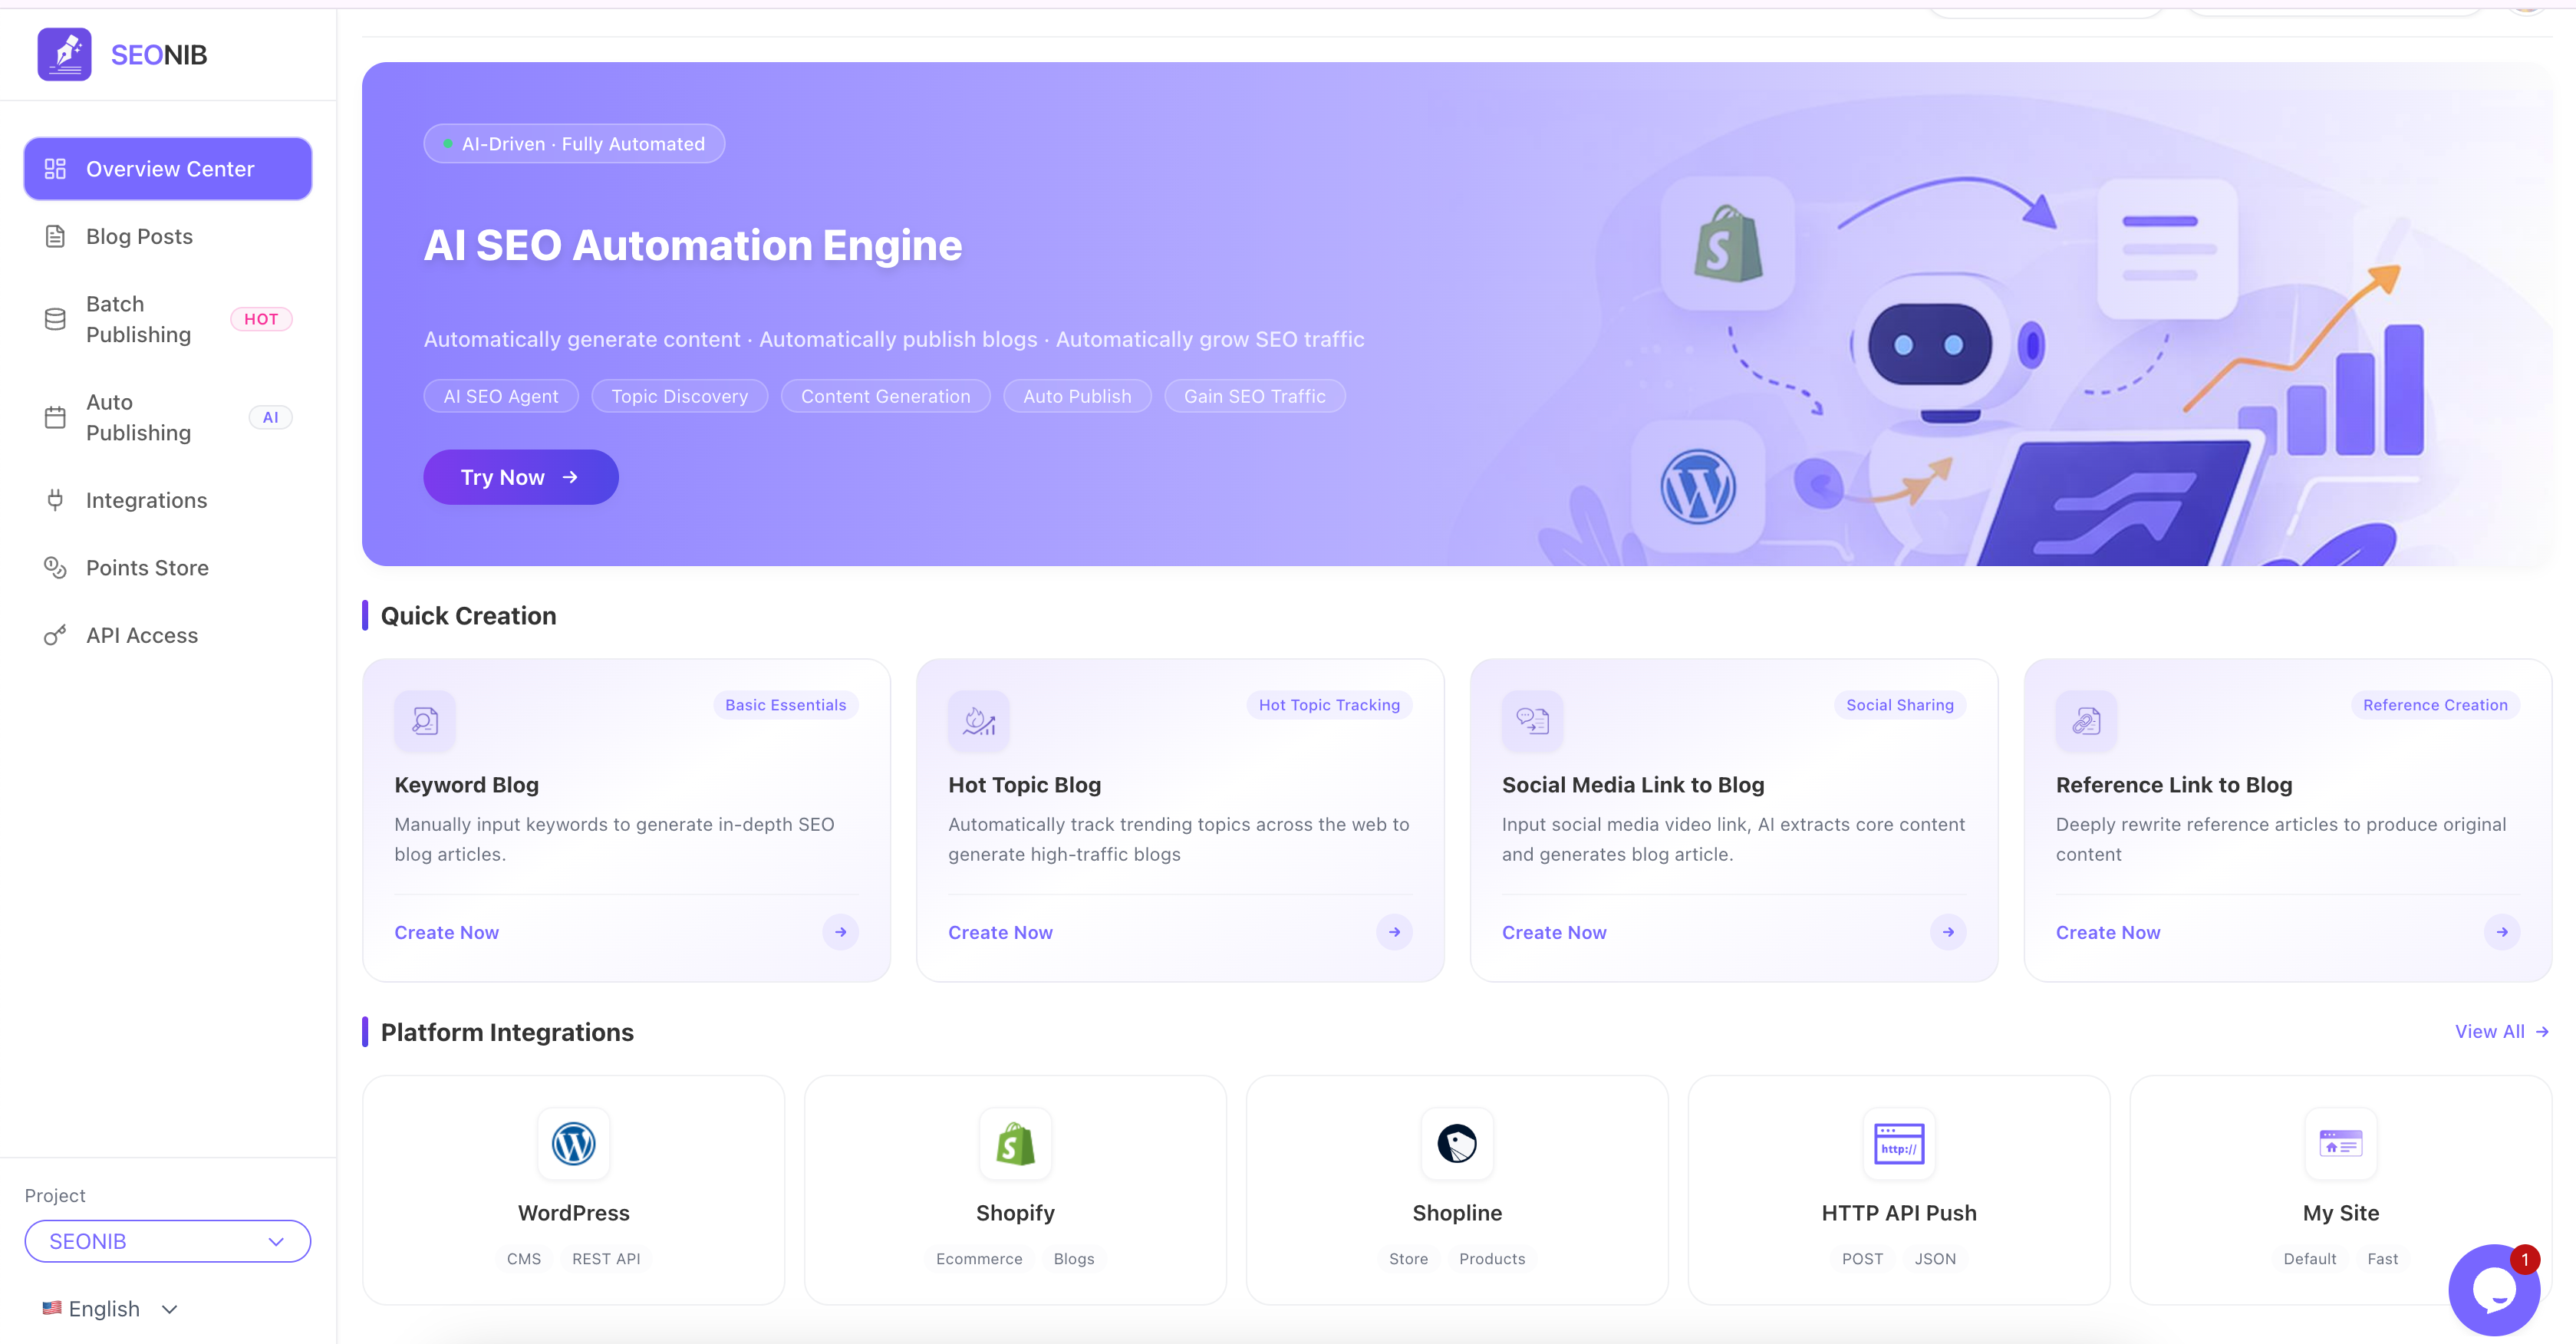
Register and log in to SEONIB. After entering the backend, create or select a Project.
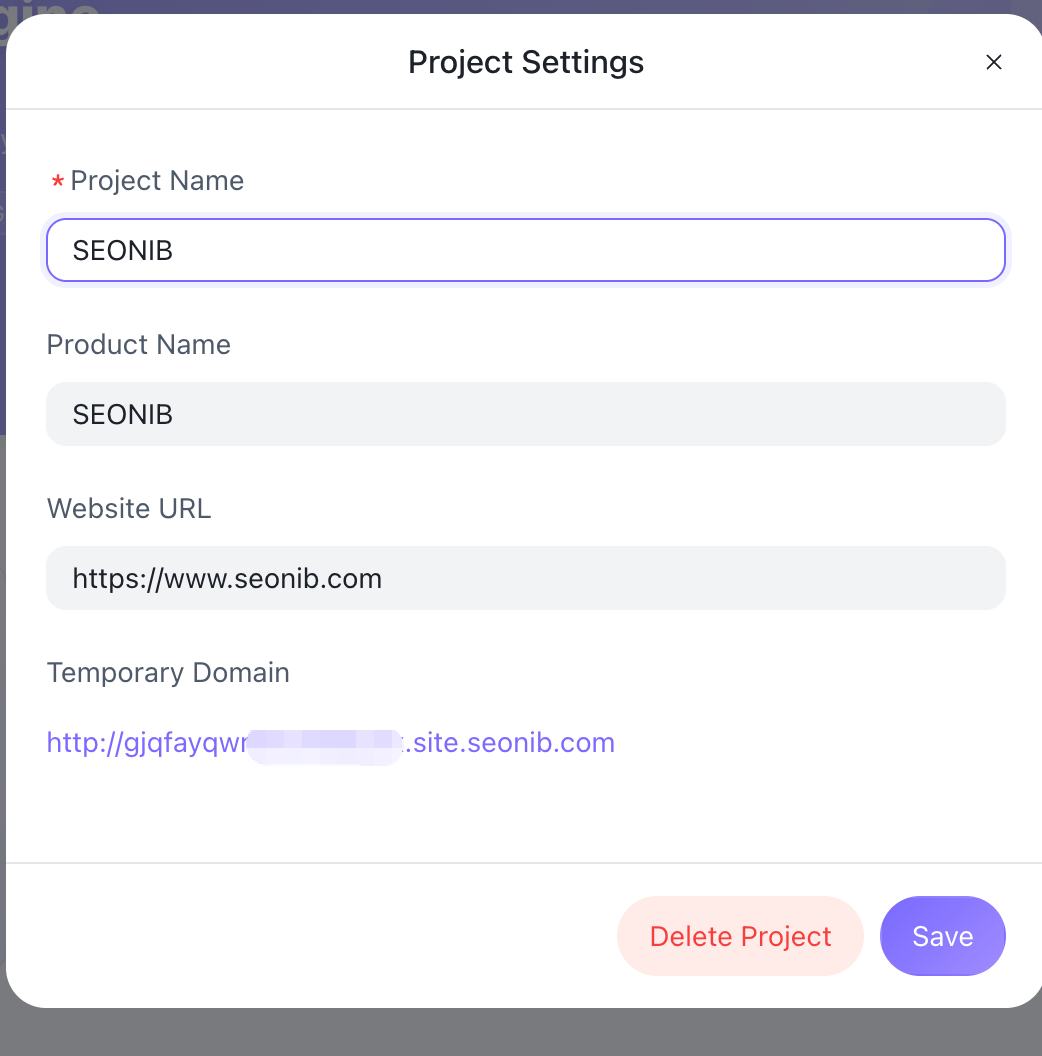
Find “Project Settings” at the bottom left:
Fill in: Product Name / Brand Name
Fill in: Official Website Link / Important Landing Page Link
After saving, these fields will be automatically populated in all subsequent blog creations (e.g., automatically inserting brand introductions and official website links at the end of articles).
Beginner Recommendation:
Create a separate Project for each brand/site. Avoid mixing multiple sites within a single project.
Think in advance about the CTA link you want to be automatically included by default (e.g., “Free Trial Page,” “Product Listing Page”).
II. Choose Suitable Creation Modes (Specialize in 1-2 First)
SEONIB offers 5 main creation modes. Beginners don’t need to use all of them; focusing on 1-2 core modes is sufficient.
Standard Blog (Keyword-Driven)
Suitable for: When you already have target keywords and want to systematically create long-form SEO content.
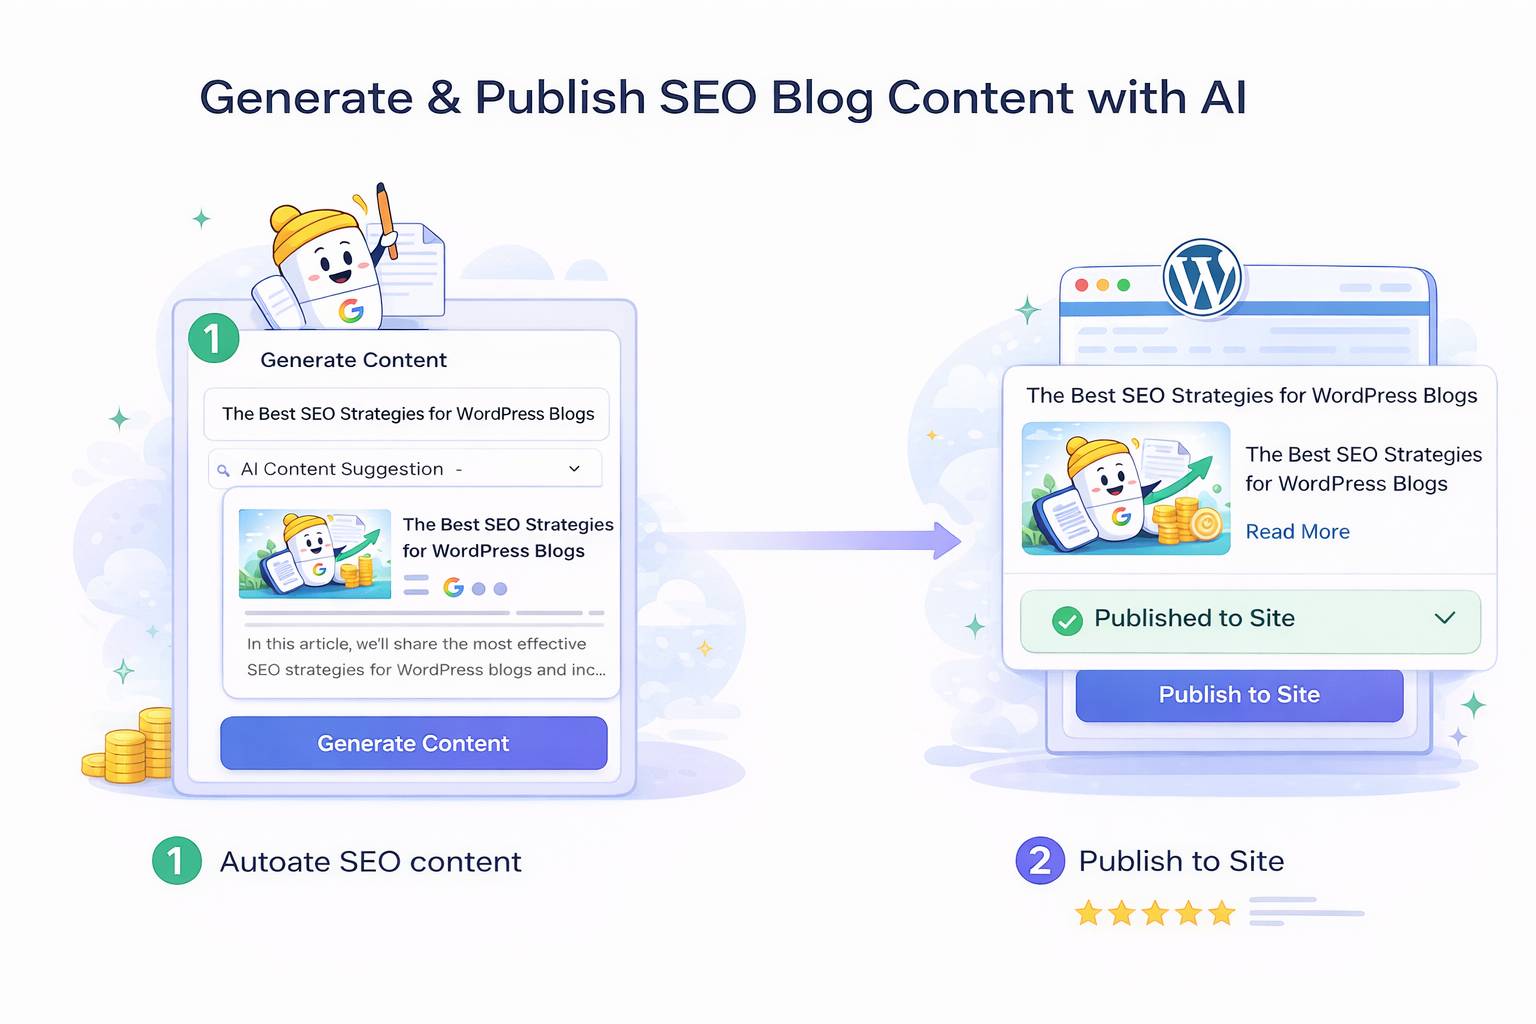
Operation: Enter keywords + desired word count → Select a template (e.g., product comparison, tutorial) → Generate with one click.
Recommendation:
- Start by creating a batch of articles around “core business terms + brand terms” to build a foundation.
- For each keyword, try to focus on a clear search intent (tutorial/comparison/case study).
Industry Hot Topic Blog (Trend-Driven)
Suitable for: When you want to capitalize on industry trends, current events, or updates.
Operation: Enter industry terms → Click “Get Latest Hot Topics” → Select a topic → Automatically rewrite and incorporate your brand information.
Recommendation:
- Place these types of articles in the “News/Updates” section, not mixed with evergreen foundational tutorials.
Social Media/Video Link to Blog
Suitable for: When you have a lot of short video content from TikTok / YouTube / Xiaohongshu / Reels, etc., and want to convert it into search traffic.
Operation: Paste the video link → AI analyzes → Automatically generate a long-form blog post.
Recommendation:
- Prioritize videos with good performance data (high views, high engagement), as this content has higher conversion potential.
Reference Link to Blog (Deep Rewrite)
Suitable for: When there are already good articles/reports in your industry, and you want to create “your own version on the same topic.”
Operation: Paste the URL of a competitor’s article or industry report → AI deeply analyzes the structure and rewrites it.
Recommendation:
- Use this to fill content gaps on your site, but remember to manually check if viewpoints/data need updating.
Handwritten Blog (Human-Centric + AI Assistance)
Suitable for: When you primarily write yourself and only need AI to help supplement paragraphs, polish, or generate certain sections.
Operation: Write manually in “Handwritten Blog” mode, and call upon AI at any time to fill in structure or supplement paragraphs.
Beginner Recommended Combinations:
E-commerce/Shopify: Standard Blog + Video/Social Media to Blog + Reference Link to Blog.
SaaS: Standard Blog + Industry Hot Topic + Reference Link.
III. Basic Configuration: Language, Structure, and Templates
Before you start generating content in bulk, set a few “global habits.”
Select Primary Language and Market
- Choose the target language in the creation interface (e.g., English site, Chinese site, multilingual).
- If creating multilingual content, it’s recommended to fix one primary language first and then expand using SEONIB’s translation/multilingual features, rather than opening them randomly from the start.
Article Structure Templates
- In Standard Blog mode, select templates suitable for your business:
- Product Comparison Template
- Usage Tutorial Template
- Listicle/Roundup Template (Top 10 / Essential Guide, etc.)
- Beginners can stick to 1-2 structures initially to enhance the consistency of your site’s article style.
- In Standard Blog mode, select templates suitable for your business:
Meta / Title Habits
- Although SEONIB automatically generates SEO titles and meta descriptions, it’s recommended that you:
- Take a quick manual look to ensure the title includes the core keyword and is clear enough.
- Try to place important terms (brand terms, category terms) towards the beginning.
- Although SEONIB automatically generates SEO titles and meta descriptions, it’s recommended that you:
IV. Connect to Your Site: Achieve “Write and Automatically Publish”
This step is crucial for upgrading from a “writing tool” to a “true content engine.”
Connect CMS / E-commerce Backend
- In SEONIB’s integration/connection settings, link your:
- Shopify / Shopline store
- WordPress site
- Or other supported platforms (e.g., Webflow, Ghost, etc.).
- In SEONIB’s integration/connection settings, link your:
Configure Publishing Rules
- Default Category: Which category/section new articles should be published to (e.g., Blog / News / Guides).
- Status Setting: Whether to publish directly or import into the CMS as a draft first.
- Scheduling Rules:
- For example, schedule to publish 1 article every morning to avoid uneven updates by publishing too many at once.
Beginner Recommendation:
Initially, it’s recommended to: Push as “Draft” first, do a quick human review, and then click publish.
Once stable, switch some topics to “auto-publish directly,” such as:
- Long-tail tutorial content
- High-frequency FAQ content
V. Practical Strategies for Your First Batch of Content (Pitfall Avoidance Guide)
To avoid “writing a bunch of stuff that gets no traffic” right from the start, you can follow this rhythm:
First Batch: Build the Business Foundation
- Use “Standard Blog (Keyword-Driven)” to write about your core products/services:
- Core feature introductions
- Core scenario tutorials
- Frequently Asked Questions (FAQ)
- Goal: Ensure that people searching for your brand or category terms can find clear and systematic content.
- Use “Standard Blog (Keyword-Driven)” to write about your core products/services:
Second Batch: Capture Long-Tail Traffic
- Write more detailed blogs around typical questions and usage scenarios using long-tail keywords.
- For example:
- SaaS: How does XX industry use your type of tool to solve Y problem?
- E-commerce: How to choose XX type of product, usage guides, pairing suggestions, etc.
Third Batch: Cover Hot Topics and Competitor Benchmarking
- Use “Hot Topic Mode” and “Reference Link Mode” to add breadth to your core topics.
- Select well-written long-form articles from competitors and create an “upgraded/rewritten version” for your site.
VI. General Beginner Configuration Recommendations (You Can Copy This Directly)
Here’s a “universal beginner package.” Configuring these points should get you up and running:
Project Level:
- 1 Site / Brand = 1 Project.
- In the Project, fill in: Product Name / Brand Name / Official Main Site Link / Core Landing Page.
Content Modes:
- Start with only 2-3 modes:
- Standard Blog (Main driver)
- Video/Social Media to Blog (If you have content assets)
- Reference Link to Blog (To fill gaps)
- Start with only 2-3 modes:
Process Rhythm:
- Manually select a few keywords/topics each week (can be combined with your existing SEO tools).
- Generate the content for the week in SEONIB at once → Push to CMS drafts → Review and schedule.
Automation Level:
- First Month: All content goes through “push to draft + human review.”
- Starting from the Second Month:
- For types with stable quality (e.g., FAQs or simple tutorials), enable “automatic publishing.”
- For content that is brand-sensitive (company viewpoints, important product comparisons), continue with human review.