
How to Connect Your WordPress Website with SEONIB
Последнее обновление:3/18/2026
By connecting your WordPress site to SEONIB, you can authorize the AI SEO Agent team to fully manage your site's blog updates. Whether you use the self-hosted open-source version or the officially hosted version, you can achieve end-to-end management from trending topic monitoring to automated publishing.
I. Self-Hosted WordPress (WordPress.org) Configuration Guide
Applicable to sites where you purchase your own server and install the WordPress program.
Preparation
• Ensure your site runs WordPress 5.6 or higher.
• Ensure your site uses HTTPS.
Configuration Steps
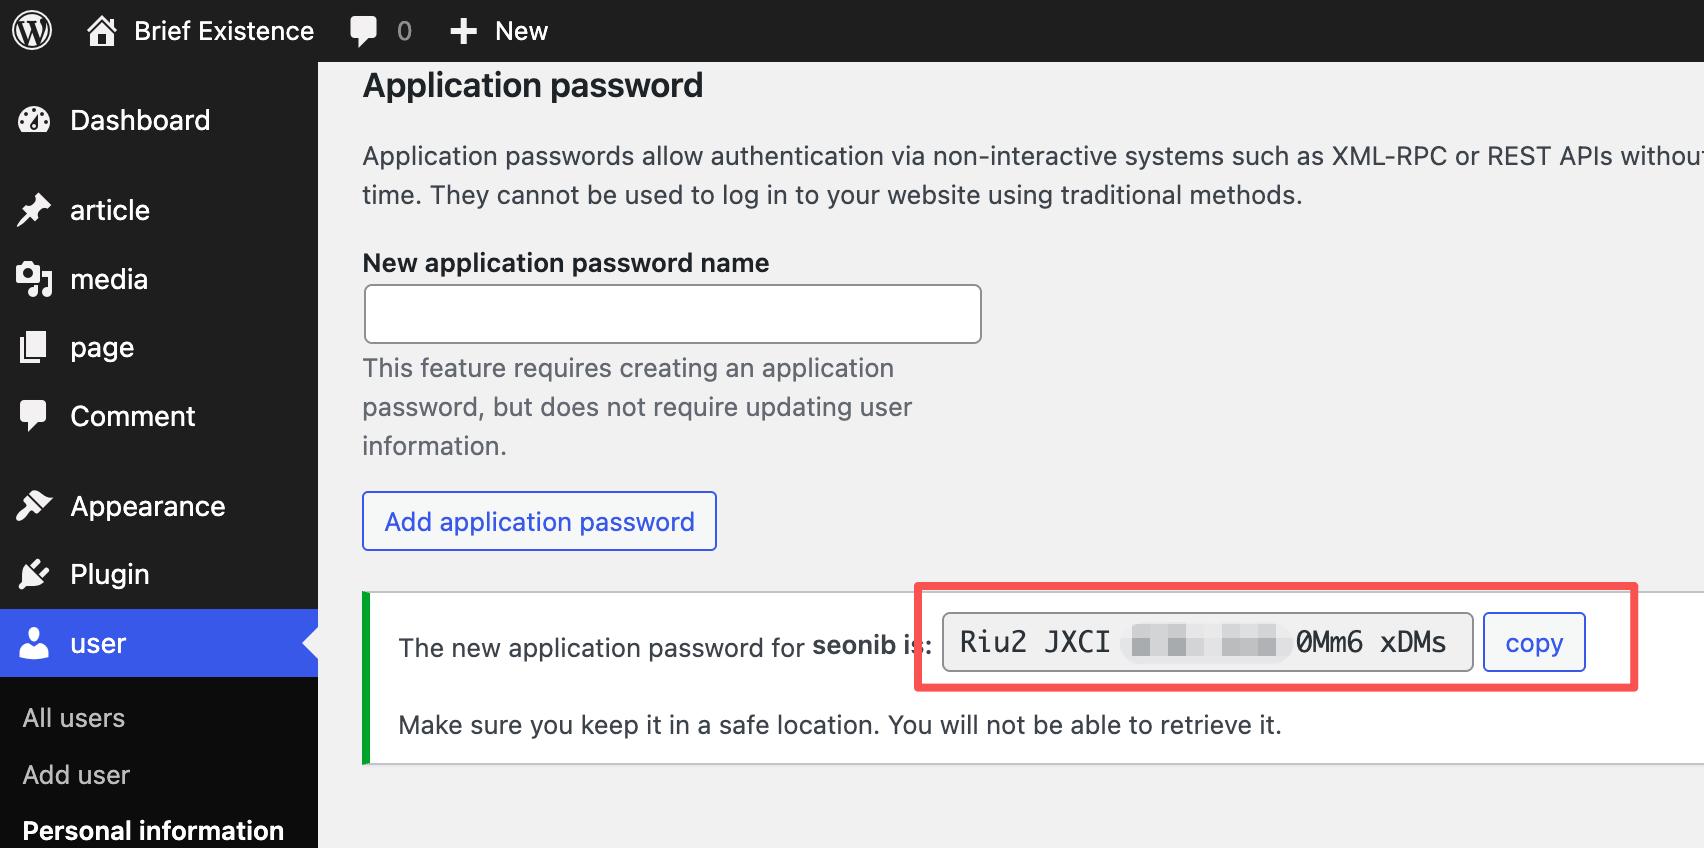
1. Obtain App Password: Log into your WordPress admin, click “Users” → “Your Profile,” scroll to the bottom and locate the “App Passwords” section. Enter a name (e.g., ‘SEONIB’) and click “Add New App Password.” Copy the generated 24-digit random password.
2. Enter details in SEONIB: Return to the SEONIB Integrations page, locate the WordPress module, and click “Configure.”
◦ Store Address: Enter your site's full domain (e.g., https://yourdomain.com).
◦ Username: Enter your WordPress account username.
◦ App Password: Paste the 24-digit password generated in your WP admin.
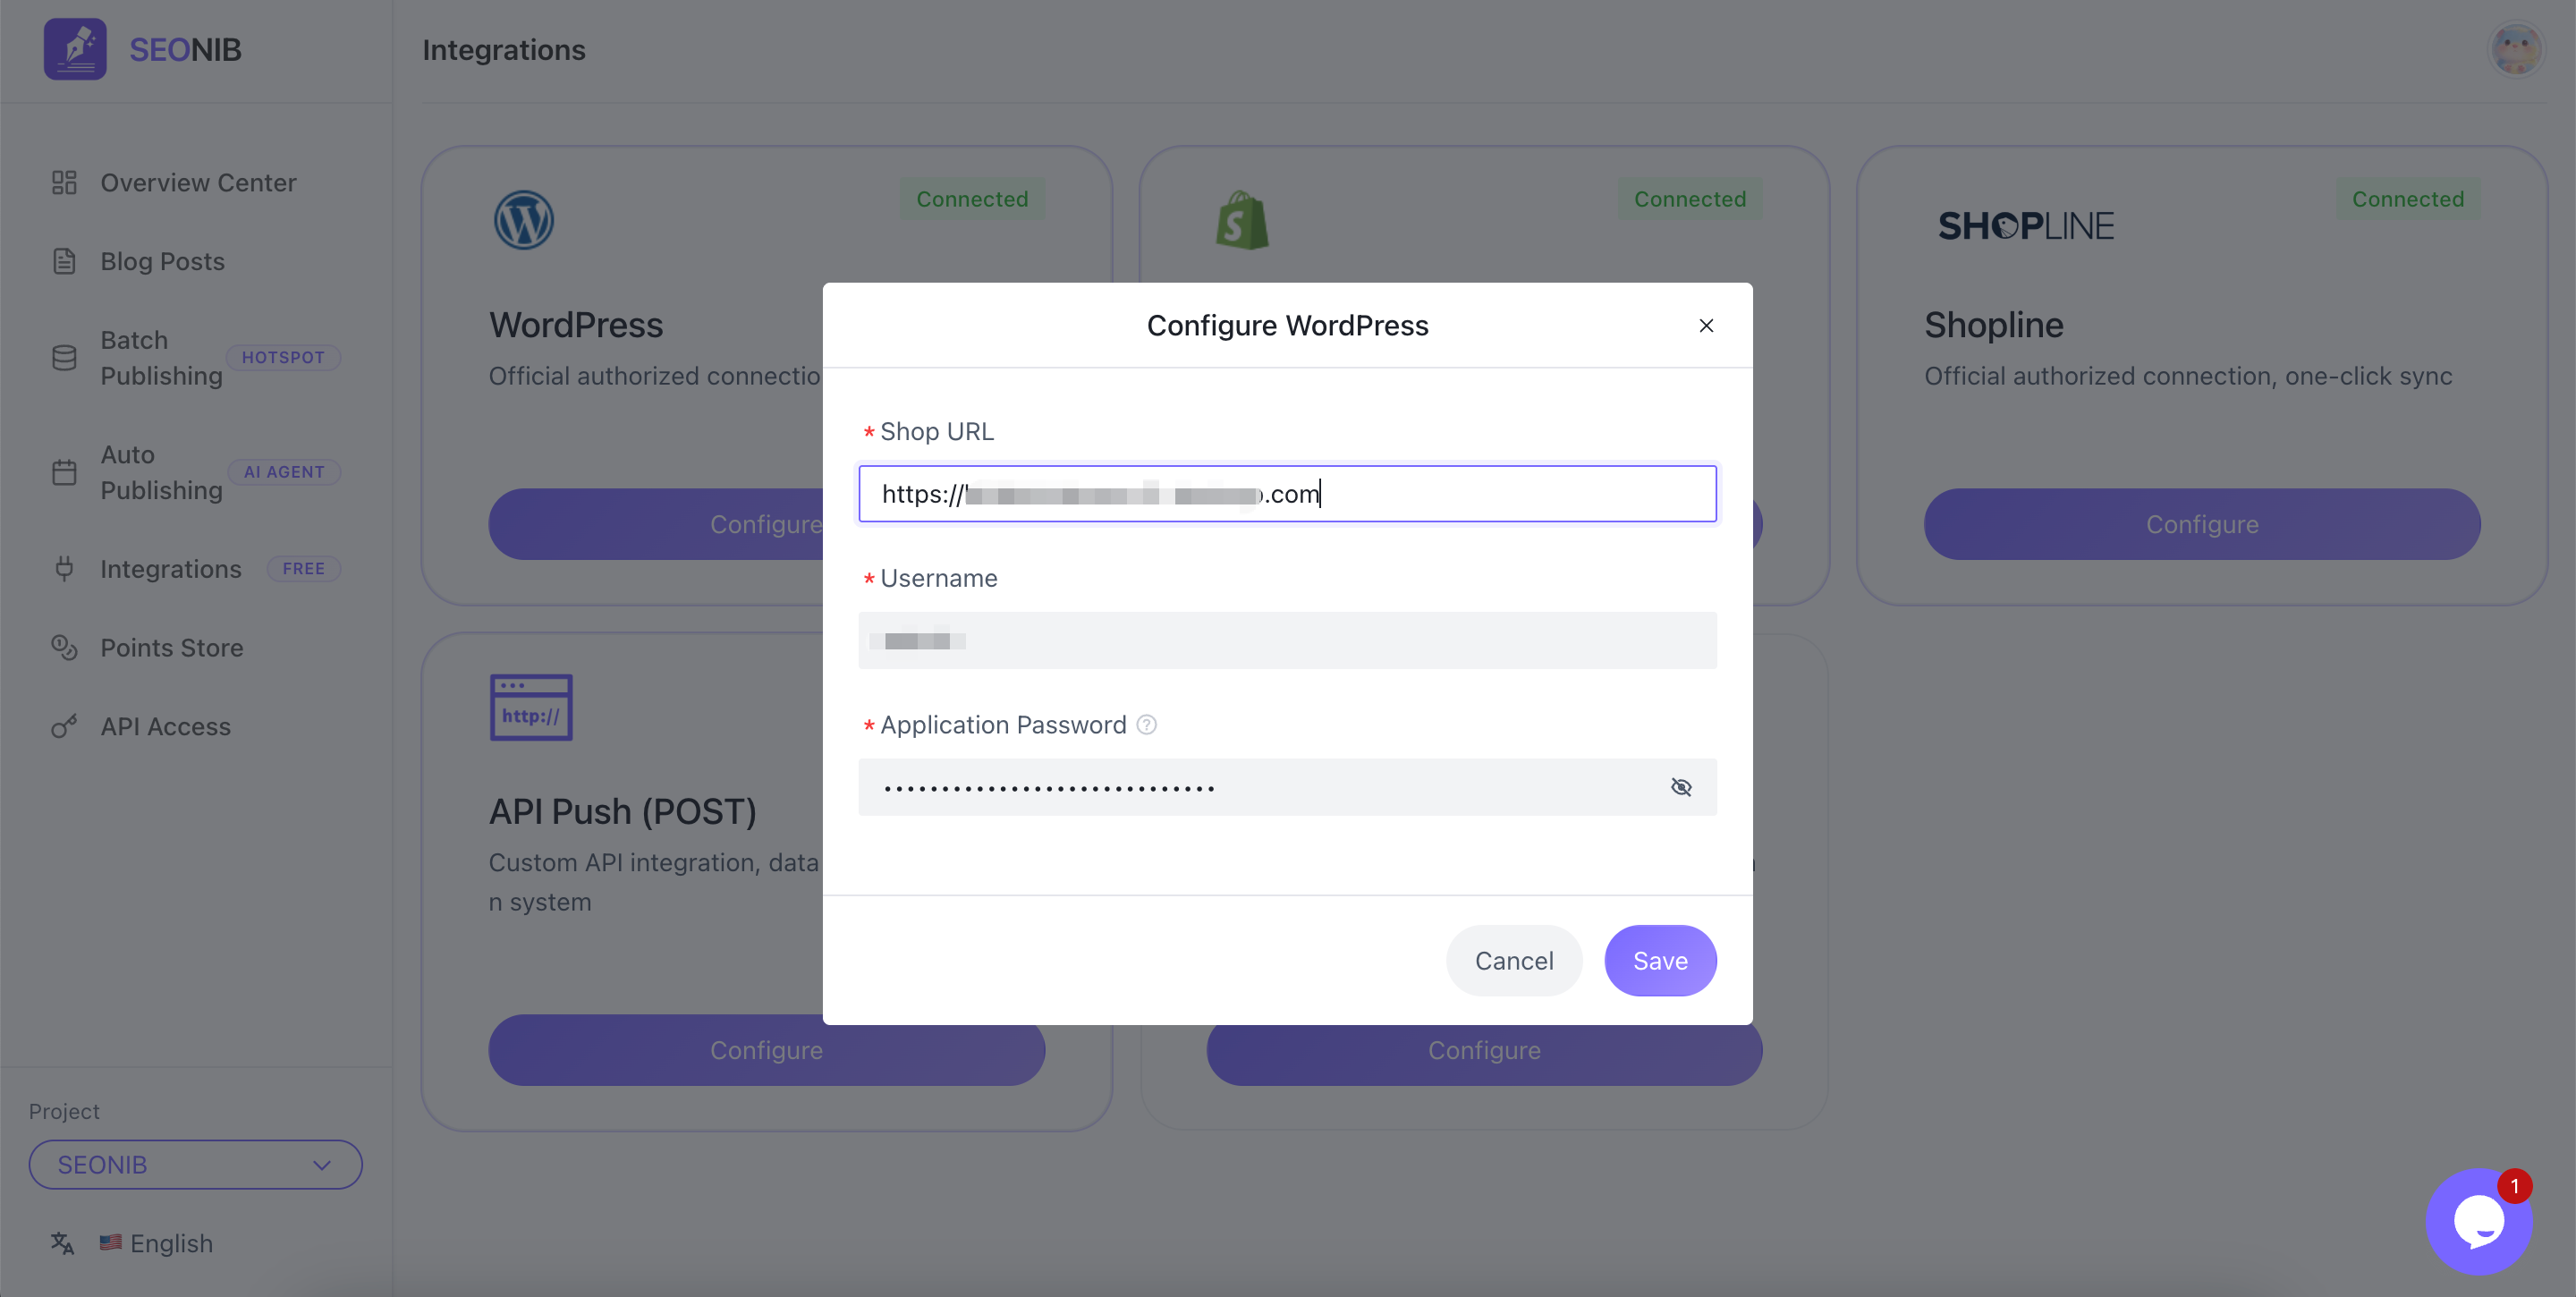
3. Save and Verify: Click “Save.” Once verified, the status will display as “Connected.”
II. Official WordPress (WordPress.com) Configuration Guide
Applies to sites hosted on the official platform.
1、Prerequisites
• Your WordPress.com plan must support plugin installation (typically Business or Commerce edition) to enable REST API write permissions.
2、Configuration Steps
1. Enable Permissions: In your WordPress.com admin dashboard, ensure your security settings allow authentication via Application Passwords or the official API.
2. Enter Information in SEONIB: In the configuration pop-up, perform the following actions:
◦ Store Address: Enter your official subdomain or custom domain (e.g., https://yourname.wordpress.com).
◦ Username: Enter your WordPress.com login email or username.
◦ App Password: We recommend generating a dedicated app key in the official dashboard.
3. Save: Click “Save” to establish the connection.
3、 How to verify after successful publishing?
After publishing content, verify using these methods:
1. Admin path: Log into your WordPress admin, click “Posts” → “All Posts” in the left navigation.
2. Status check: Review the post list to confirm newly published blog posts display as “Published”.
3. Frontend Preview: Click “View Post” below the article to preview its actual layout on your website's frontend.
4、Frequently Asked Questions (FAQ)
Q: Why do I see a “Connection Timed Out” error?
A: Check if your server firewall is blocking external API requests, or verify if the REST API has been disabled by security plugins.
Q: Where should I check if the connection fails?
A: First verify that the “App Secret” is entered correctly (we recommend regenerating and pasting it), and ensure your WordPress site hasn't disabled REST API permissions.
Q: Will AI-generated content include images?
A: Yes. The Agent automatically matches high-quality illustrations based on modeling depth and syncs them to your WordPress media library with one click—no manual uploads required.